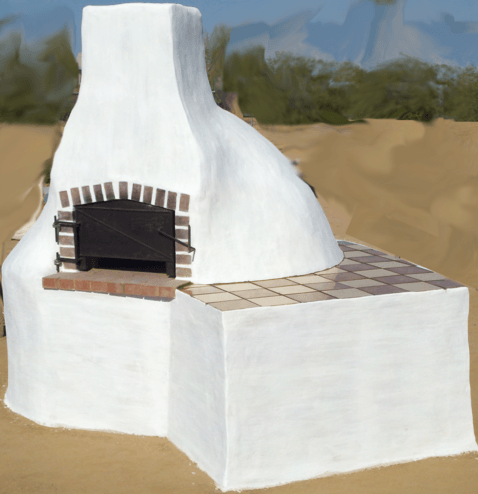
So I went outside this morning thinking that today was the day I would have the oven ready for whitewash. I mixed up more slip and grabbed my rag and I started rubbing the front of the chimney. I figured this was a good place to start. I started at the top of the chimney and worked my way down to the brick arch and that’s where I got one hell of a surprise.
The left side of the grout on the left side of the center brick suddenly crumbled and I found that there was nothing behind it. I’m thinking that as the oven has been fired over and over it expanded and the void was slowly created. Since any small cracks that showed up I fill, I never saw the void and since I only added to the front to fill the crack nothing ever made it in to fill the void.
You can’t quite see it in the picture but, there is a crack of light on the other end and I can see the opposite wall of the chimney through it. This is not good at all but, it does explain why that crack in the chimney kept coming back. So before I could do anything else I had to fix this. So I mixed up a small sticky batch of cob. I made sure there was enough sand in the mix so it won’t crack more or compress. I found the perfect sized flat blade screwdriver to fit into the gap. I pressed the cob mix in and then worked and packed it in tight with the screwdriver. I made sure to work it all the way in then fill more and pack again. I did that until it was sealed. Then I laid on the hearth and reached up and worked some cob mix into the crack inside the chimney. I’m hoping that this should alleviate the chimney crack that has been stemming from this.
Now that the huge gaping hole has been fixed I can get on to wiping down the rest of the chimney and dome. I wiped down the sides of the the chimney and the dome. I also wiped down the counter to add to and smooth out the grout. Then I let it all dry, made lunch and took a nice break from the scorching heat. This has been the hottest month of August on record ever here in Arizona. So you can imagine just how it’s been working out in the heat. I have learned to take plenty of breaks and drink lots of water and iced tea. I will say this for the heat though, it does help with the stiffness and soreness of my muscles. It does nothing for the pain of my injuries though.
So after lunch I went out and started rubbing and buffing out the chimney and dome.
I also rubbed and buffed any drips or marks that had fallen on the base. I also went back and buffed out the connection between the dome and base.
I also buffed out the counter. I have to say that I like the way this has come out. It has a nice light texture that should hold the whitewash very well and is nicely rounded with a flowing feel. Tomorrow I’ll be able to start the whitewash.
I also pulled off the outer door and cleaned it off and wiped it down with some vegetable oil again to re-season it and keep it from rusting. While I was working on the door my son Charles scrubbed the bricks on the oven floor with a wire brush to remove all of the slip that had dripped on it. We took all of the dust from the oven floor and rubbed it into the cracks between the bricks and used a squirt bottle the wet the cracks down. I do this to refill the cracks because over the last year the sand and cob had worked it’s way down inside the cracks. I also may have removed some of the loose material on top when I used the shop-vac to remove all of the ash and debris inside the oven to prepare the dome to repair the cracks. When Charles was done I worked on cleaning up the oven floor I worked on cleaning off the exposed bricks just to give the oven a cleaner, more finished look.
The one thing left that I want to do before I whitewash and seal the counter is to fill the open grout spaces around the bricks. I figure that I should do that so I can also paint the grout white and help to waterproof it. I’m really feeling just how close this oven is to completion and I’m looking forward to it. I figure if someone like me with all my injuries can do this, then just about anybody can and I think it’s great that it’s almost there.
Oh just one other thing to mention. Whatever rag you use don’t expect it to last. My rag started out about 6 inches wide by 12 inches long and by the time I was done it was about 8 inches long and between 2 and 3 inches wide with many holes and strings. So expect the rag to be disposable.


